Updated December 8, 2025
Cleaning out an attic takes 2-8 hours depending on the size, clutter level, and safety conditions. You’ll need protective gear, proper lighting, cleaning supplies, and ideally a project partner. If the job is too large or unsafe, local attic cleanout and junk removal services can handle everything for you.
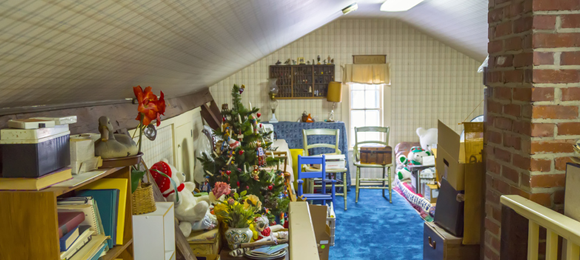
Attics are one of the least-visited areas in the home, and also one of the most likely to develop dust, mold, pests, and poor insulation when neglected.
A thorough attic cleanout once per year prevents costly issues and improves air quality and energy efficiency.
This guide covers exactly what you need, how to clean your attic step-by-step, and what to do after the cleanup, including donation, disposal, and professional help options.
Jump to:
- What You’ll Need to Get Started
- Step-by-Step Attic Cleanout Guide
- What to Do After You Clean Your Attic
- Donate, Recycle, or Dispose of Unwanted Items
- Professional Attic Cleanout Options
- Find Attic Cleanout Services Near You
- FAQs
Find attic cleanout services near you
What You’ll Need Before You Start an Attic Cleanout
Attics often contain dust, mold spores, rodent droppings, and poor ventilation, all of which can cause respiratory problems or allergies. Before you begin, gather the following items:
Checklist
- Protective gear: mask/respirator, gloves, safety glasses
- Adequate lighting: portable lights, headlamps
- Temperature-safe conditions: avoid extreme heat
- Project partner: never work alone in tight spaces
- Cleaning supplies:
- Duster
- Broom & dustpan
- Vacuum
- Disinfectant
- Cleaning cloths
- Garbage bags
Essential Safety Tips Before Starting
1. Wear Protective Gear
Attics collect allergens, dust mites, and sometimes mold. Wear:
- N95 or KN95 mask
- Gloves
- Safety glasses
- Knee pads or cushioned mat (if floors are unfinished)
2. Make Sure You Have Good Lighting
Good lighting helps you spot:
- Rodent droppings
- Bug infestations
- Mold or mildew
- Damaged insulation
- Water stains or leaks
Bring portable LED work lights or a headlamp.
3. Work Only in Safe Temperatures
Attics can be 20-40°F warmer than the rest of the home, so it's important to avoid midday cleaning in hot climates. If you absolutely must work in the attic when temperatures are high, work cautiously and take breaks. Symptoms of heat stress include dizziness, nausea, pale skin, headache.
Work early in the morning or evening when temperatures are lower to be safe.
4. Don’t Work Alone
Attics are confined spaces with hazards like:
- Steep stairs
- Weak flooring
- Low ceilings
- Heavy boxes
Have someone available to assist and ensure safety.
Step-by-Step Guide to Clean Out Your Attic
Follow this structured process to avoid creating more mess and to ensure a thorough cleanout.
Step 1: Clear the Area
Remove all items from the attic if possible. If space is limited, move items to one section to open up cleaning space.
Pro Tip: Any exposed fabrics (curtains, clothes, linens) should be washed or dry-cleaned to remove dust and allergens.
Step 2: Dust From Top to Bottom
Start from the highest surfaces and work downward:
- Ceiling
- Rafters & beams
- Light fixtures
- Fans
- Walls
- Window frames
- Trim
Use an extendable duster for hard-to-reach areas.
Important: Expect dust to settle—work methodically from high to low areas to avoid re-cleaning.
Step 3: Vacuum, Then Sweep, Then Vacuum Again
Large amounts of dust require a special approach:
- Vacuum first to capture loose dust
- Sweep to collect remaining dirt
- Vacuum again to finish the job
This prevents dust from being thrown back into the air.
Step 4: Disinfect High-Touch Areas
Once dust is removed, disinfect:
- Light switches
- Door handles
- Windows & screens
- Storage surfaces
Remove window screens and rinse them outdoors or in a shower.
Find attic cleanout services near me
What to Do After Cleaning Your Attic
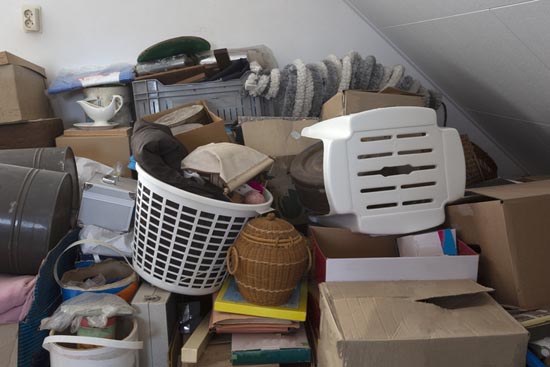
Once your attic is clean, it’s time to decide what stays, what gets donated, and what needs to be thrown away.
Organize & Sort Your Items
Create three piles:
- Keep (items staying in the attic)
- Donate
- Dispose
This helps you track items, identify damage, and reduce clutter.
While sorting, look for:
- Chewed wires
- Shredded cardboard
- Moisture stains
- Mold or mildew
- Unusual odors
These may indicate pests or structural problems.
Finalize Your Storage Plan
Keep frequently used items near the attic entrance and rarely used items toward the back.
Storage Tips:
- Use airtight plastic containers instead of cardboard
- Label all containers
- Group items by category
- Keep walkways clear
- Avoid storing flammable items
Donate, Recycle, or Dispose of Unwanted Items
For bulky items like:
- Old furniture
- Mattresses
- Electronics
- Broken appliances
- Large boxes of junk
The simplest option is to hire a local junk removal company. They handle lifting, carrying, and disposal so you don’t have to haul heavy items down attic stairs.
Donation centers accept:
- Clothes
- Toys
- Small furniture
- Decorations
Anything defective, moldy, or broken should be discarded.
Alternative Options: DIY vs. Hiring Pros
If midway through your project you discover the attic cleanout is too large, too hot, or too risky, professional help is available.
When to Hire a Junk Removal Company
You have large or heavy items
- You suspect mold or rodent infestation
- You need fast, same-day removal
- You can’t safely navigate the attic
When to Rent a Dumpster
Best for DIY attic cleanouts involving large quantities of items.
- Load at your own pace
- Good for whole-home decluttering
- Affordable for bulk debris
- Typically $250-$450 for a 10-yard dumpster
Learn more:
- Donate Your Unwanted Items Easily with Junk Removal
- Tips for Achieving and Maintaining an Organized Home
- How Decluttering and Organizing Can Transform Your Home and Improve Mental Health
How to Find Attic Cleanout Services Near You
To find reputable attic cleanout professionals:
- Search for local junk removal companies
- Compare pricing, reviews, and availability
- Confirm they handle bulky items, stairs, and hazardous materials (if needed)
- Request 2-3 quotes for comparison
- Ask if disposal fees or labor fees are included
Locally owned haulers often offer the best prices and fastest service.
Hometown makes it easy to compare multiple attic cleanout providers with a single quote request. Simply enter your zip code and choose up to three companies to get free pricing.
FAQs
How often should I clean out my attic?
At least once a year to prevent dust buildup, mold, pests, and energy inefficiency.
How long does an attic cleanout take?
Most attic cleanouts take 2-8 hours, depending on clutter level and attic size.
Is it safe to clean an attic in summer?
Only if temperatures are safe. Attics can become dangerously hot, so work early or late in the day.
What can I store in my attic?
Store non-perishable, non-flammable items in airtight containers. Avoid liquids, candles, electronics, and sensitive fabrics.
How do I dispose of heavy or bulky attic items?
Hire a junk removal company for safe, fast removal from difficult spaces like attics
Find junk removal services in your area
Read more: